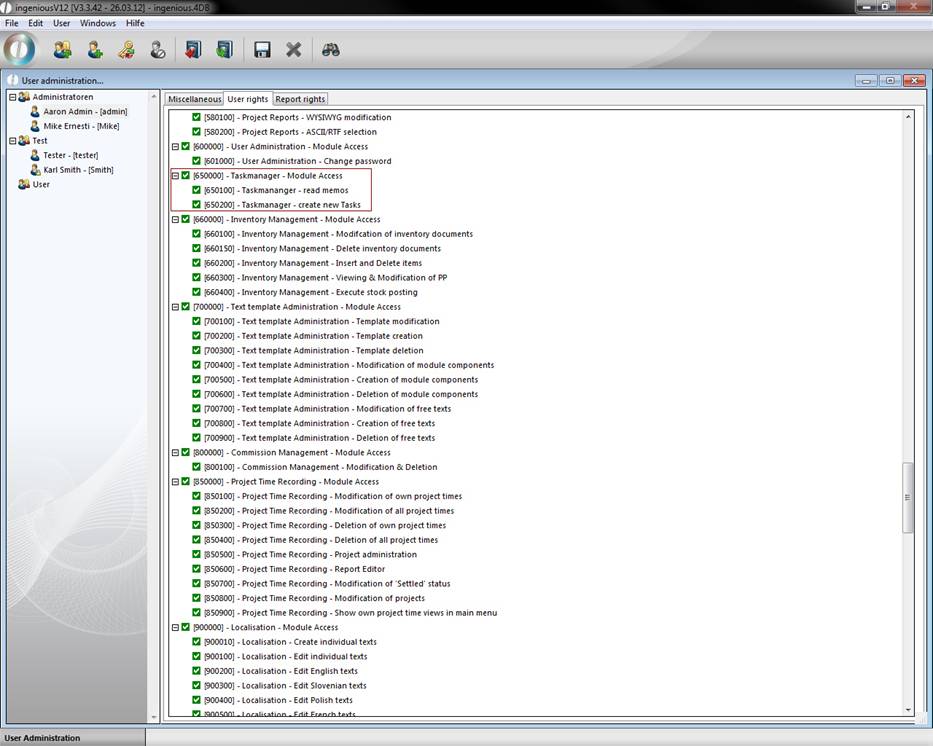
The Task Manager facilitates the delegation and termination of tasks to employees. In order to be able to use the Task Manager, you must clear the appropriate rights in the user administration and restart the program.
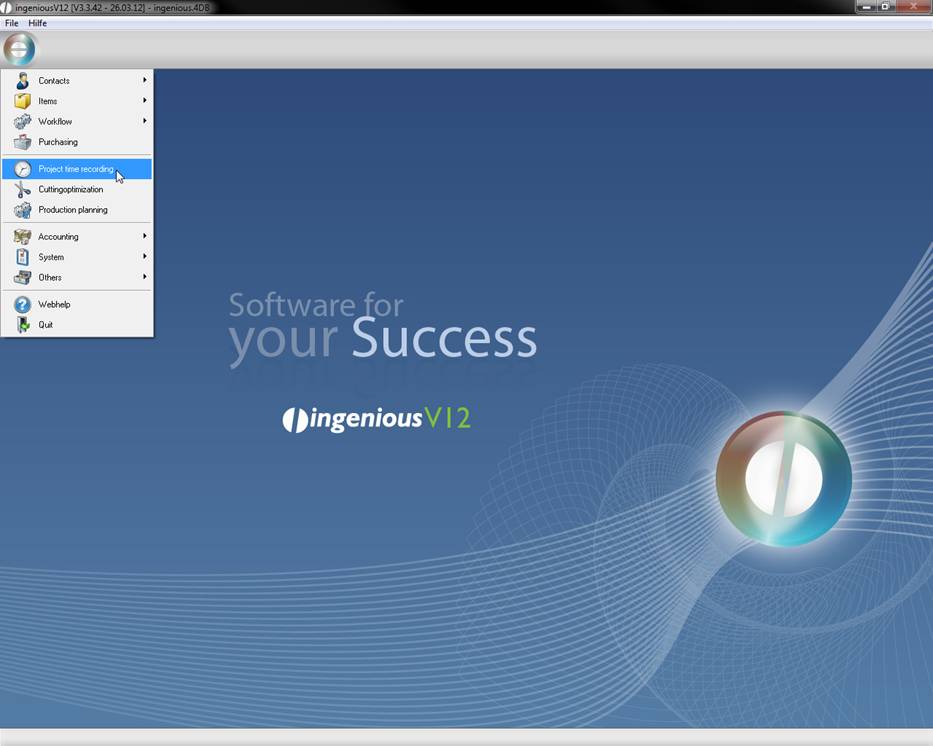
The taskmanager where you can delegate and plan tasks you can open by clicking project time recording in the main menu.
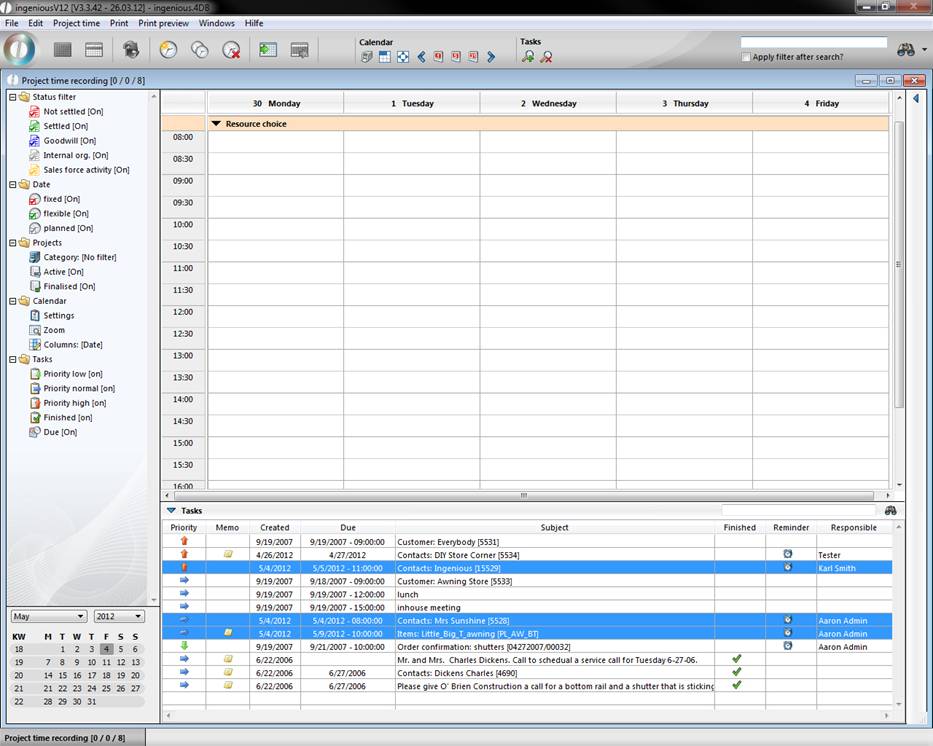
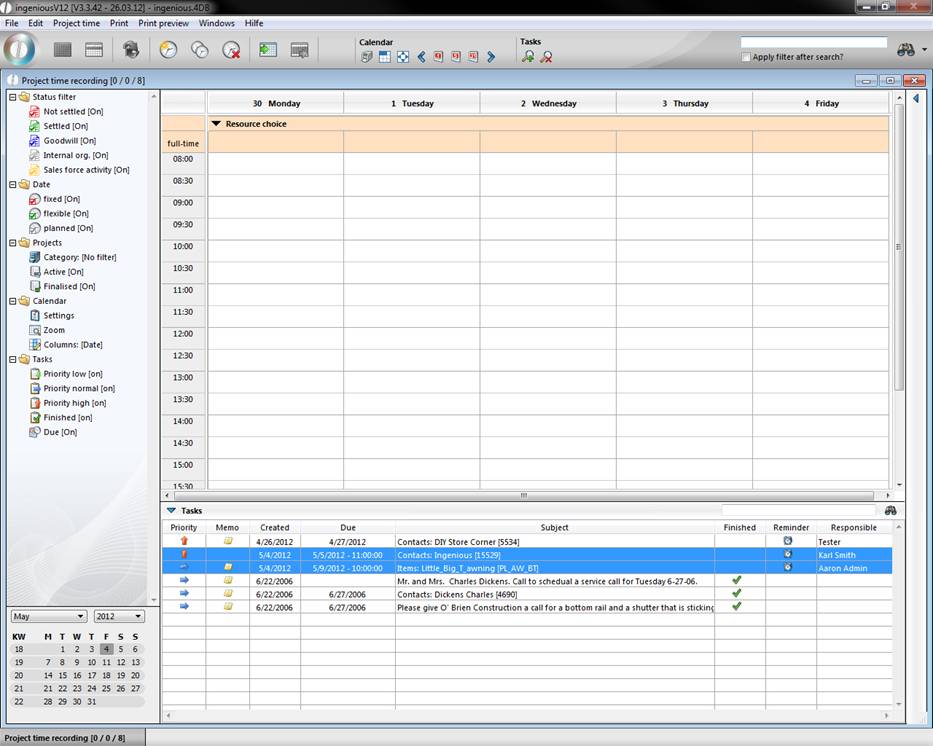
In the following illustration, the Task Manager has been allocated with several tasks for a better understanding.
In the “Priority” column, the priority of a task is displayed (![]() low.
low. ![]() normal,
normal, ![]() high). In addition, tasks with a high priority are displayed in red. In the “Memo” column, the
high). In addition, tasks with a high priority are displayed in red. In the “Memo” column, the ![]() icon indicates which task has been sent as a memo to all employees. The “Created” and “Due” columns show when a task has been created or until when it should be completed. The subject column illustrates to which object the task has been attached. In the “Finished” column, the already completed tasks are indicated with a
icon indicates which task has been sent as a memo to all employees. The “Created” and “Due” columns show when a task has been created or until when it should be completed. The subject column illustrates to which object the task has been attached. In the “Finished” column, the already completed tasks are indicated with a ![]() checkmark. In the “Reminder” column, the alarm clock icon
checkmark. In the “Reminder” column, the alarm clock icon ![]() indicates that a report has been sent to the responsible operator on the due date of the task. The name of the operator is listed in the last column. The Task Manager also has its individual search function. In the following illustration you will find a short description of the different function buttons.
indicates that a report has been sent to the responsible operator on the due date of the task. The name of the operator is listed in the last column. The Task Manager also has its individual search function. In the following illustration you will find a short description of the different function buttons.
![]() Create a new task
Create a new task
![]() Delete a task
Delete a task
![]() Print the list view
Print the list view
![]() Display/Remove tasks with a low priority
Display/Remove tasks with a low priority
![]() Display/Remove tasks with normal priority
Display/Remove tasks with normal priority
![]() Display/Remove tasks with high priority
Display/Remove tasks with high priority
![]() Display/Remove completed tasks
Display/Remove completed tasks
Creating a new task
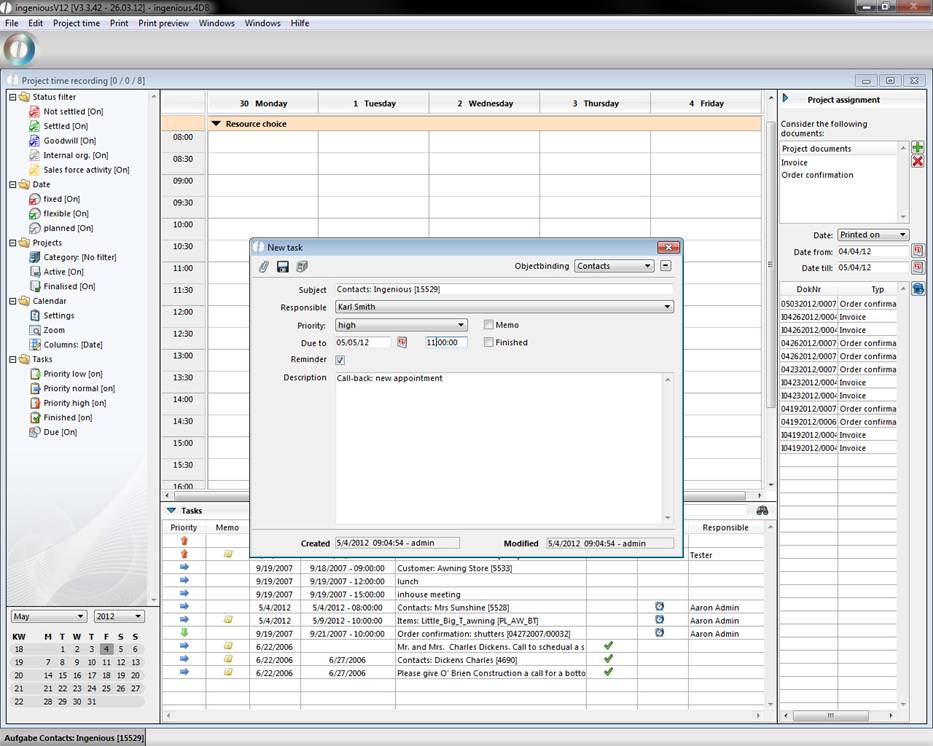
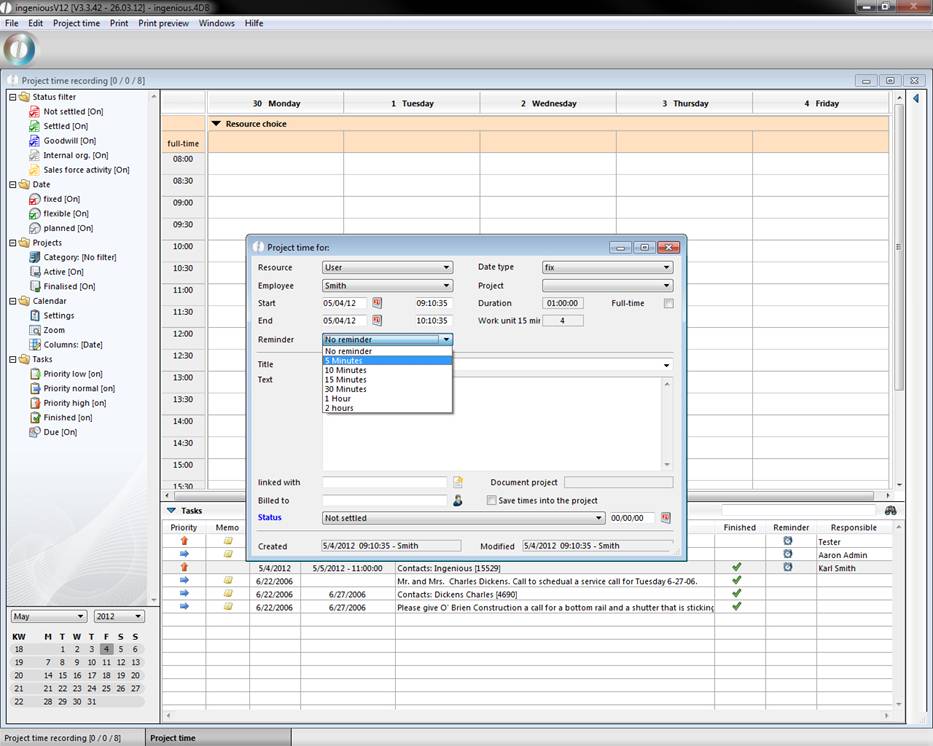
In order to enter a new task, simply click on the ![]() button “Enter new task”. The following window then opens.
button “Enter new task”. The following window then opens.
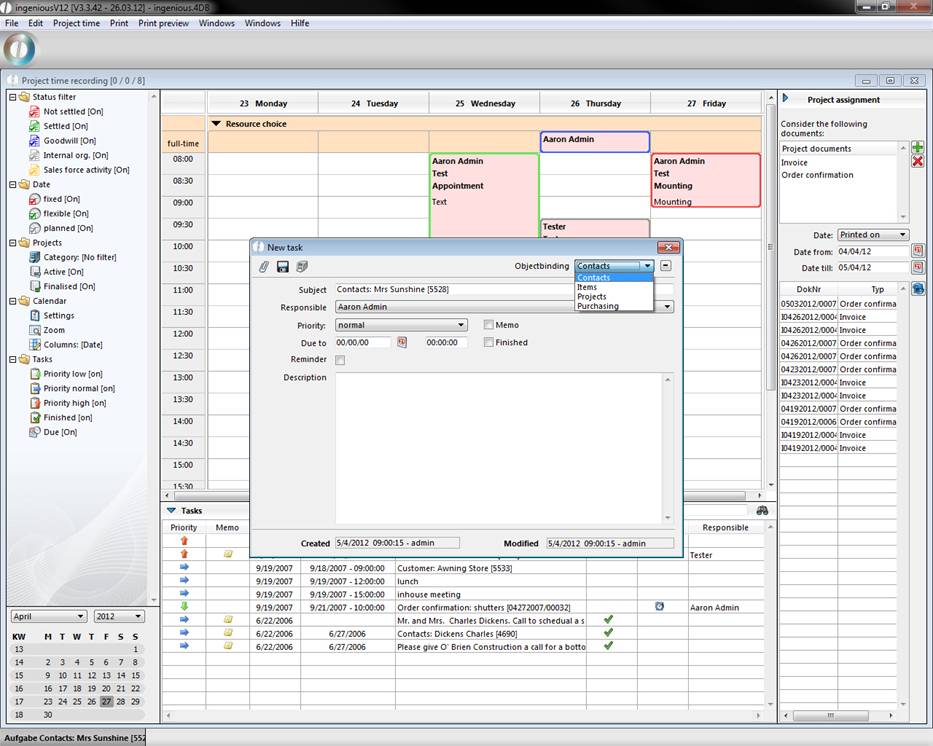
Here you have the possibility to link the task to a specific object such as “Customer”. By selecting this object link, the appropriate list view will open and the desired contact can be selected with a mouse click. The contact will then be inserted automatically in the subject heading. In order to delete an object link again, simply click on ![]() . With the
. With the ![]() button, “Change to attachment”, you can always switch to the detail view of the selected object.
button, “Change to attachment”, you can always switch to the detail view of the selected object.
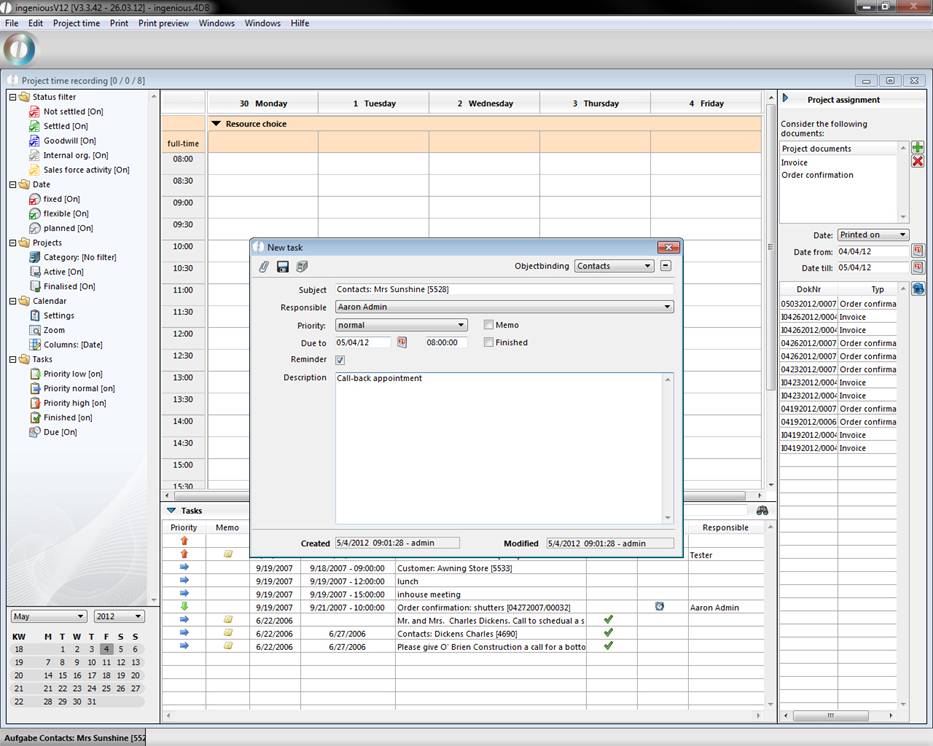
In the “Responsible” field, you can select the user to whom the task should be directed. In addition, you can select between three different priority levels: normal, low and high. In the “Due to” area, the date and time when the task should be completed can be specified. The task can be saved with ![]() and printed via
and printed via ![]() .
.
Practice “Creating tasks”
In this exercise you will create three new tasks.
-
Click on the icon “Create a new task”. Select the object link “Customer” in the opened window
-
Select a contact, for instance “Mrs Sunshine”, in the contact list view by double-clicking.
-
Fill in the following fields as illustrated.
-
Save the task and click on the icon to return to the Task Manager that should contain the new task.
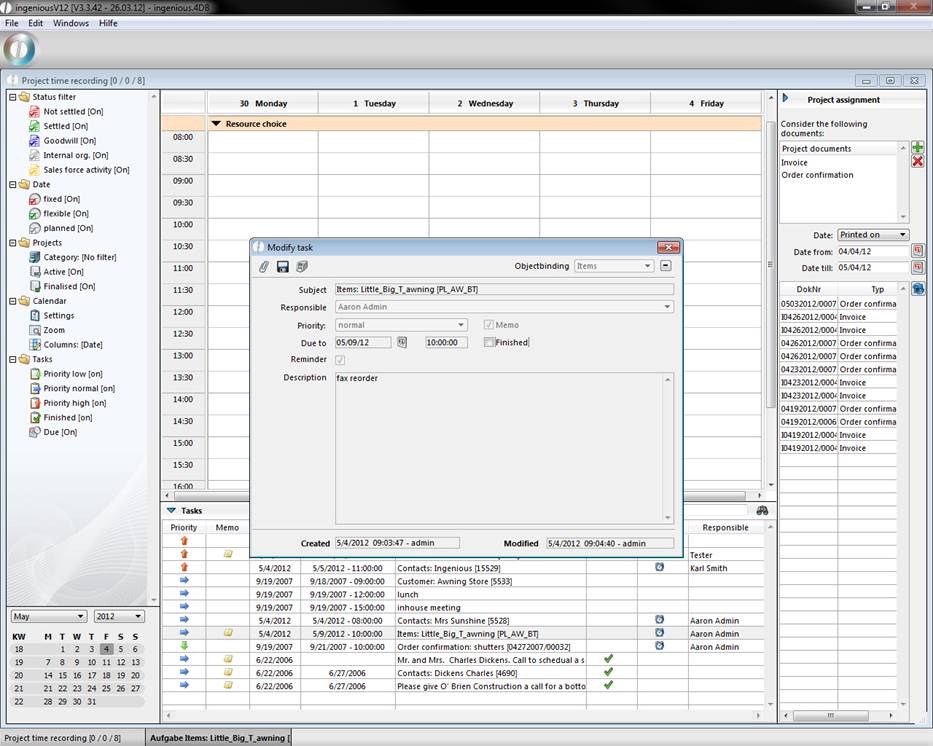
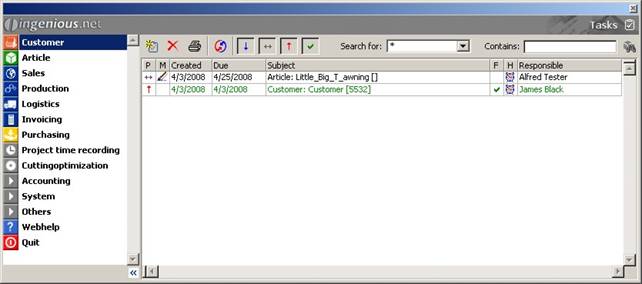
5. Now create a new task. Select option “Items” for objectbinding this time. Choose an article, e.g. “Little Big T awning”, in the now appearing article catalogue.
-
The new task will be sent to all employees as a memo, so place a checkmark in the field “Memo” with a single mouse click. Fill in the remaining fields as illustrated and save the task. Return to the Task Manager. Here the task sent as a memo will be marked with this icon.
-
Now the last task will be created. It is important that you select the operator “Karl Smith” in the “Responsible” field. The priority will be labeled as high in this case.
-
Now you see the three attached tasks in your Task Manager.
-
Exit the Task Manager. Switch to the user administration and give the user Karl Smith the necessary rights for the use of the Task Manager.
-
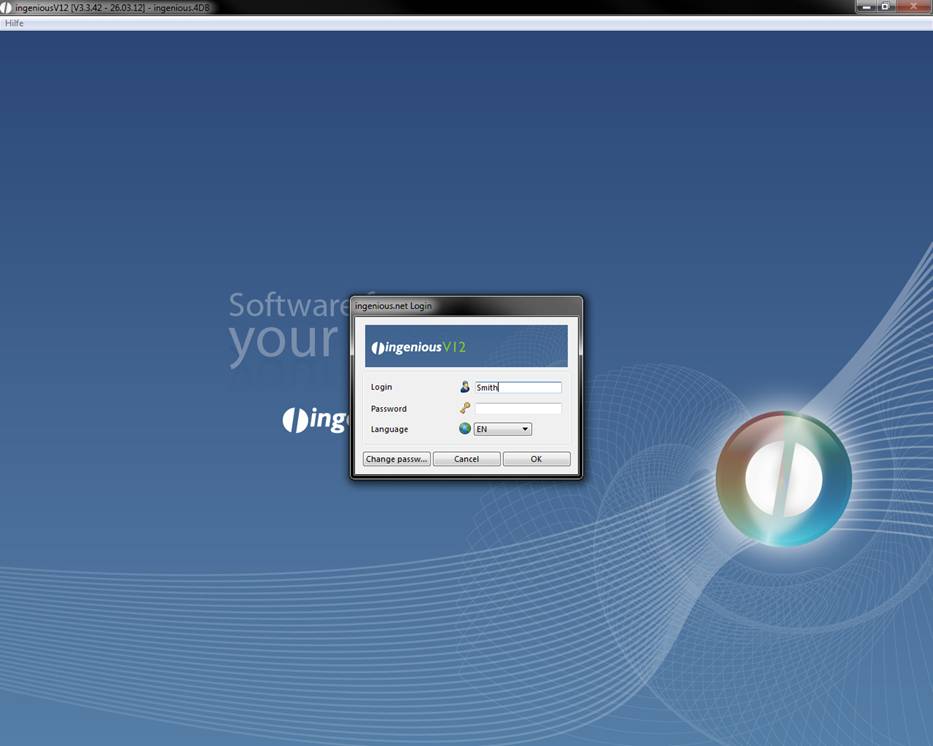
Close Ingenious.V12 and login again as Karl Smith (Login: Smith, password stays blank).
-
When you open the Task Manager, you will see two entries: the memo that has been addressed to all employees and the task for which Karl Smith is responsible.
-
To finish the exercise, open the first task and click on the field “Finished”. Now the task will be displayed in green in the Task Manager and check marked in the “Finished” column.
Attach a task directly to the object
The creation of a new task is not only possible with the Task Manager. It is also possible with the ![]() icon in the detail view of the individual contact, article or project.
icon in the detail view of the individual contact, article or project.
Instruction notice for task due dates
You have the possibility to retrieve a notice when a task is due with the help of the Task Manager. Here you just need to activate the “Give notice when due”. When the respective employee logs in Ingenious.V12 on the due date, the notice report appears immediately.
Print options
There are two print functions in the Task Manager. The first possibility would be the printout via the detail view of the tasks. Here you can print all the information needed for a task via the print icon ![]() . In addition you have the possibility to enter further remarks. Direct printing is carried out via the “File” menu item. The second print option concerns the list view of the Task Manager. Here, all completed tasks of the employee can be displayed. You also have the possibility to add changes or upgrades
. In addition you have the possibility to enter further remarks. Direct printing is carried out via the “File” menu item. The second print option concerns the list view of the Task Manager. Here, all completed tasks of the employee can be displayed. You also have the possibility to add changes or upgrades
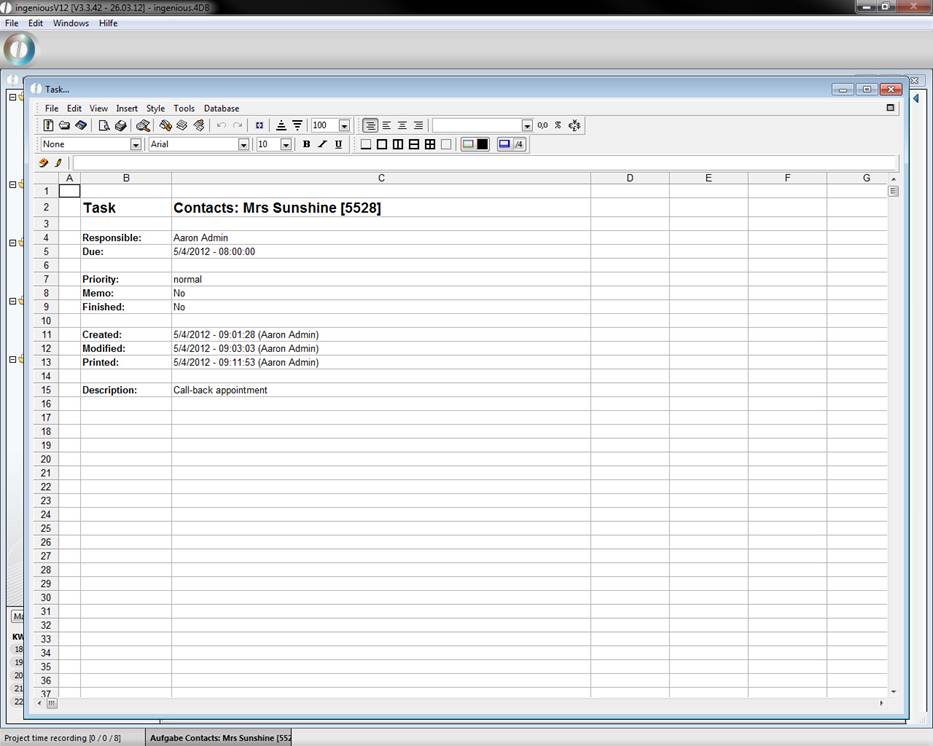
Print view of a task